
Bathroom Remodel
Average Cost of Tile Installation Per Square Foot
Tile Installation Costs Explained The average cost per square foot of a tile installation project can vary widely; on the low end you might see
Professional tile installation is essential for achieving a beautiful, durable result that performs well over time. While DIY or inexperienced work can lead to costly mistakes—like uneven tiles, improper alignment, or poor surface preparation—a professional ensures every step is done right, from initial consultation and precise planning through demolition, layout, installation, grouting, and post-installation care. Professionals also navigate challenges like specialty materials or complex spaces with skill, delivering a high-quality finish that enhances your space and protects your investment for years to come.
The professional tile installation process typically consists of:
When you choose The Tile Genie for your professional tile installation, you’re choosing a local team with decades of experience in general construction, kitchen and bath remodels, and expert tile installations across Oklahoma. From your initial consultation to the final inspection, our seamless process—including meticulous planning, premium materials, and clear, consistent communication—ensures your project is handled with precision and professionalism. With seasoned craftsmen overseeing every detail and a one-year warranty backing our work, The Tile Genie delivers a stress-free, top-quality tile installation experience that stands the test of time.
Proper tile installation is critical not just for appearance, but for the long-term durability and performance of your floors, walls, or backsplashes. While DIY projects or hiring inexperienced installers may seem like a way to save money, these approaches can lead to costly mistakes and repairs down the road, such as:
Hiring a professional for tile installation ensures that every step of the process is handled with skill and precision, from preparation to finishing touches. Experienced installers understand how to avoid these common pitfalls that can compromise both the look and lifespan of your tilework, resulting in a finished space that not only looks beautiful but also performs well over time.
The benefits of professional tile installation include:
Proper tile installation is a complex, multi-step process that demands specialized tools, precise measurements, careful surface preparation, and meticulous execution throughout the entire project. Each stage—from layout planning to grout application—requires an expert eye and steady hand to ensure a flawless result. An experienced, professional company will bring this level of care and attention, continually reviewing and refining their work to catch even the smallest imperfections before they become bigger problems. You can and should expect this kind of thoroughness and craftsmanship from your contractor in order to achieve a high-quality, long-lasting finish.
The initial consultation and planning phase lays the foundation for the entire tile installation project, setting clear expectations and ensuring every detail is accounted for before work begins. A professional approach during this stage helps avoid surprises later and ensures the final result meets your needs, style, and budget.
During the initial consultation and planning phase, you can expect:
Come prepared to this part of the process with your initial thoughts on budget, design, and materials. Giving your installer something to work with up front helps them more accurately guide you toward the best version of your vision, but also be sure to keep an open mind to any suggestions your installer may have. For example, you may have a low budget but want a tile type that looks high-end. Explaining this to your installer narrows the range of tile types they’ll discuss with you. As one possibility, they may suggest ceramic, which can be made to look like wood or stone.
Additionally, tell the installer you’re working with as much as you can about the space you want tiled. Let them know of any peculiarities or hazards, such as potential asbestos, lead paint, or mold. Although they’ll conduct a thorough pre-inspection to look for these issues before work starts, giving them a heads up may help prepare them and decrease the chances of any delays due to surprises.
Demolition and site preparation are critical steps that ensure a clean, safe, and stable foundation for your new tile installation. When done improperly, this phase can expose hidden hazards, compromise the surface integrity, or lead to costly issues later. Professional installers have the expertise to manage this process carefully, address potential risks—especially in older homes—and prepare the site according to best practices and building codes. In some cases, you may need to vacate your home during this stage for safety reasons, and your installer will advise you in advance if that’s necessary.
If demolition is required, professionals will typically:
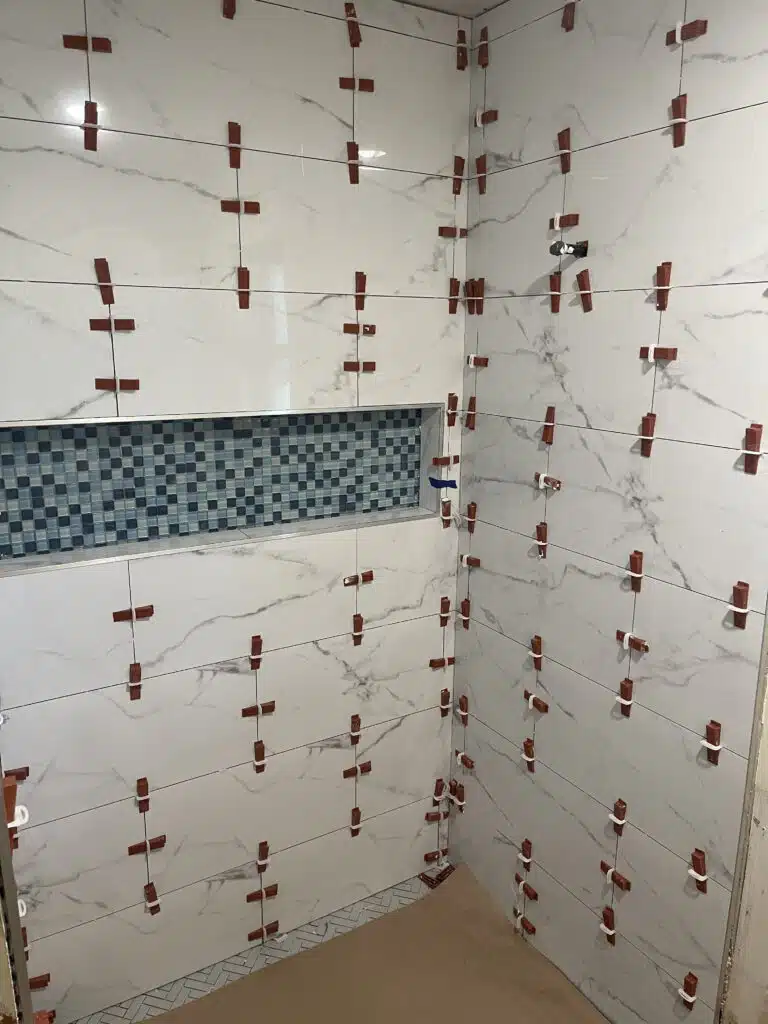
Laying the pattern is one of the most important steps in tile installation, since it determines the symmetry, flow, and overall visual impact of the finished surface. A professional installer ensures that the layout is precise, balanced, and free of issues like uneven edges or awkward cuts that can detract from the look of the space. This stage requires careful planning and expert execution to create a pattern that complements the room’s dimensions and design goals.
When laying out the pattern, a professional installer will:
Tile installation is the phase where preparation and planning come together, and it requires precision, skill, and attention to detail to achieve a durable, professional result. This is where mistakes—such as uneven tiles, poor adhesion, or misaligned joints—can quickly compromise both the appearance and longevity of the entire project, which is why an experienced installer is essential. Professionals work carefully to ensure every tile is properly positioned and securely set, creating a smooth, level surface that will last.
During tile installation, a professional installer will:
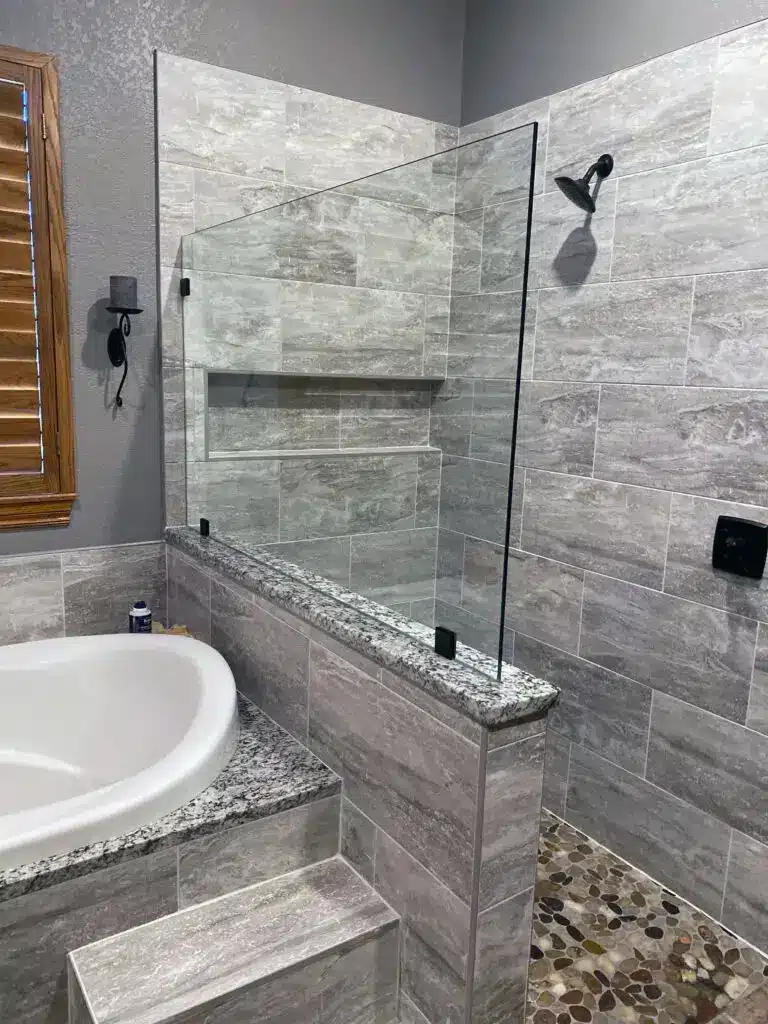
Grouting and finishing are critical steps that not only complete the appearance of your tile installation but also seal and protect it. This phase requires careful application to ensure clean lines, uniform joints, and a durable seal that prevents moisture intrusion. A professional’s skill ensures that grout is properly applied and that the tiles are cleaned without damaging the fresh joints or leaving unsightly residue behind.
When it’s time for grouting and finishing touches, a professional installer will:
The post-installation phase ensures that your tile surface is ready for long-term use and provides you with guidance for proper care. It’s important that this step is handled by a professional, who will inspect the work to confirm everything has cured correctly and that the finished surface meets quality standards.
After installation of your tile is complete, you can expect:
Some tile projects demand additional care, expertise, and precise planning, making the experience of a professional installer even more critical. Factors such as the type of tile, including glass or other specialty materials, require specific adhesives and techniques to prevent issues like improper setting or discoloration. Complex space layouts, such as curved walls or tight corners, call for meticulous preparation and skillful custom cuts to achieve a flawless result. An experienced professional will anticipate these challenges, explain how they impact the project, and develop thoughtful solutions or alternatives to ensure a high-quality, lasting installation.
Choosing The Tile Genie means partnering with seasoned professionals who combine expert craftsmanship, top-tier materials, and clear communication to bring your tile vision to life without all the stress. From personalized consultation and precise planning to meticulous installation and final touches, our methodical approach is backed by decades of experience, a streamlined process that minimizes disruption, and a one-year warranty for peace of mind. With The Tile Genie, you can count on a smooth, professional experience and results that are built to endure and enhance your space for years to come. Contact us today for a free consultation!
Tile Installation Costs Explained The average cost per square foot of a tile installation project can vary widely; on the low end you might see

Tile Genie Hits the Track! This past weekend, Tile Genie traded trowels for tire tracks as we proudly sponsored the #14 car at the NASCAR
Tile is one of the best and most versatile materials you can choose for a bathroom remodel thanks to its moisture resistance, durability, low maintenance,